
Bulkhead Progress!
It’s been a couple of weeks of house work, including installing a new storm door and painting the front door. Did I take any photos? No.
This weekend was back full steam on Calypso. The 57 degree sunshine (in late January!) made it possible to do a lot. Accomplishments included: templating AND cutting out AND dry-fitting the bulkhead that will form the aft end of the fridge/chart table (which is also the forward end of the quarterberth), 2 coats of paint on the port side hull/settee berth in the main salon, deciding on where the engine cover will go, and drilling out the old running backstay plugs that have been leaking like sieves.
Stages of bulkhead work:
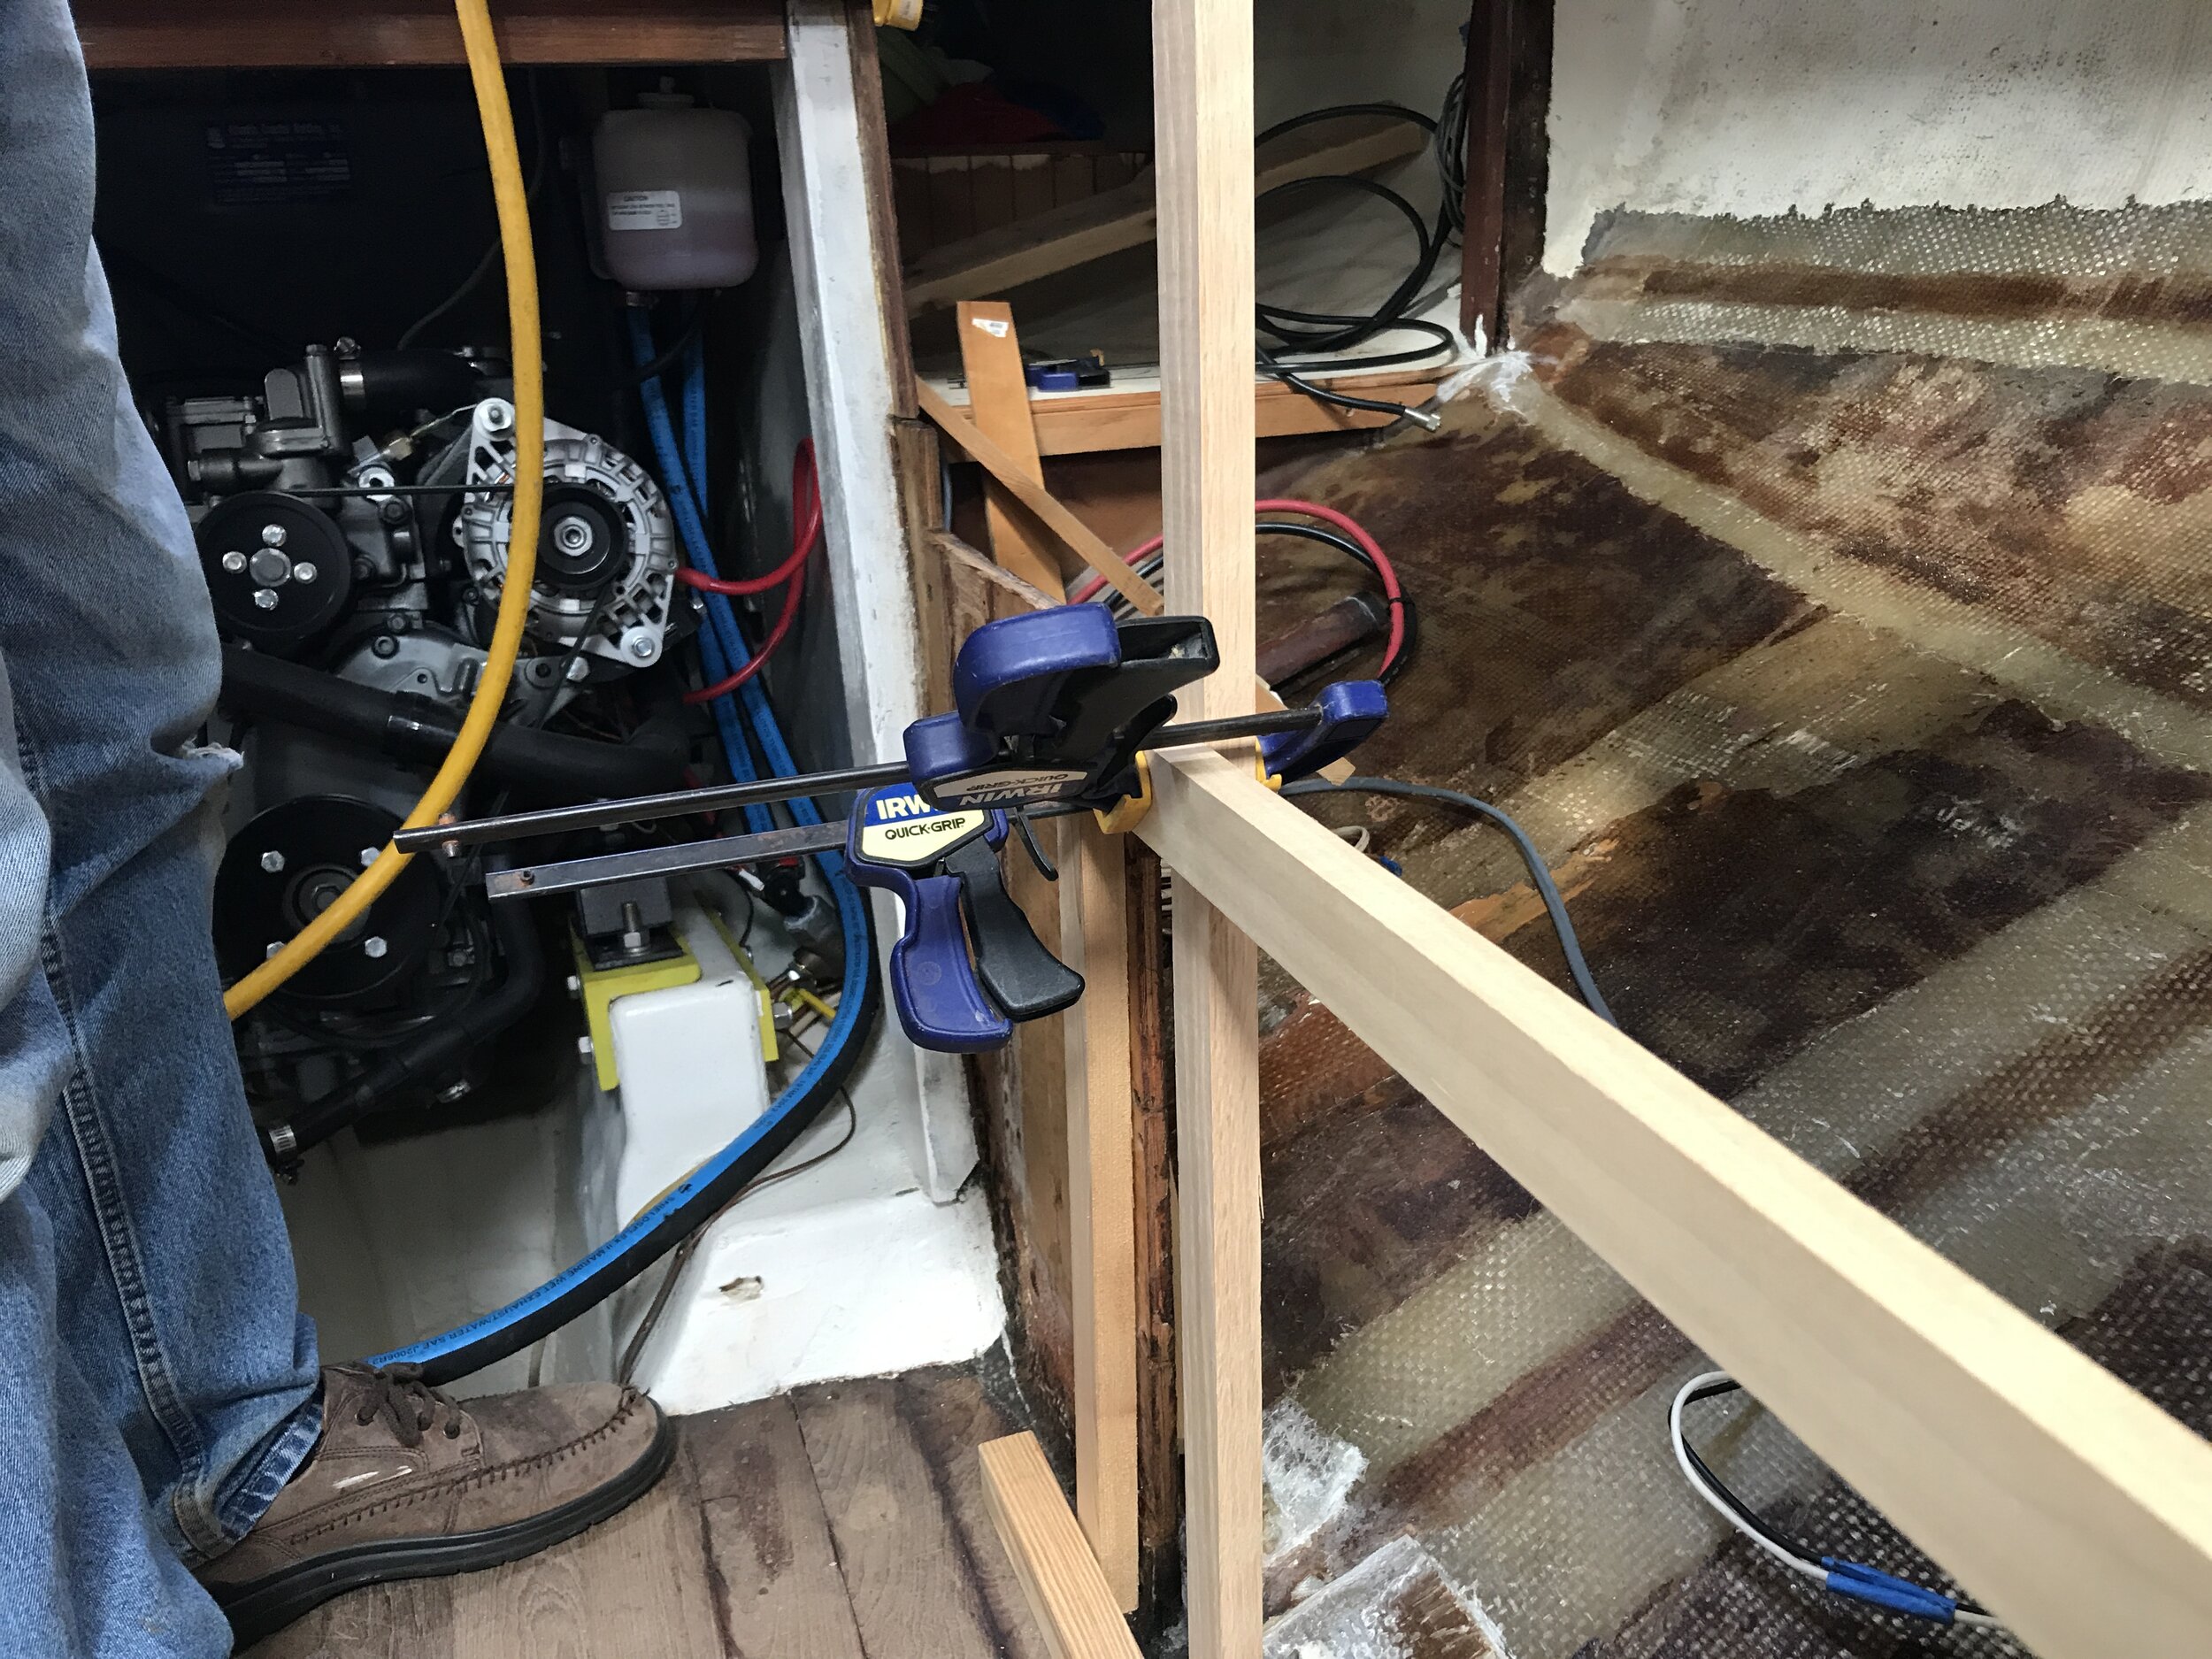
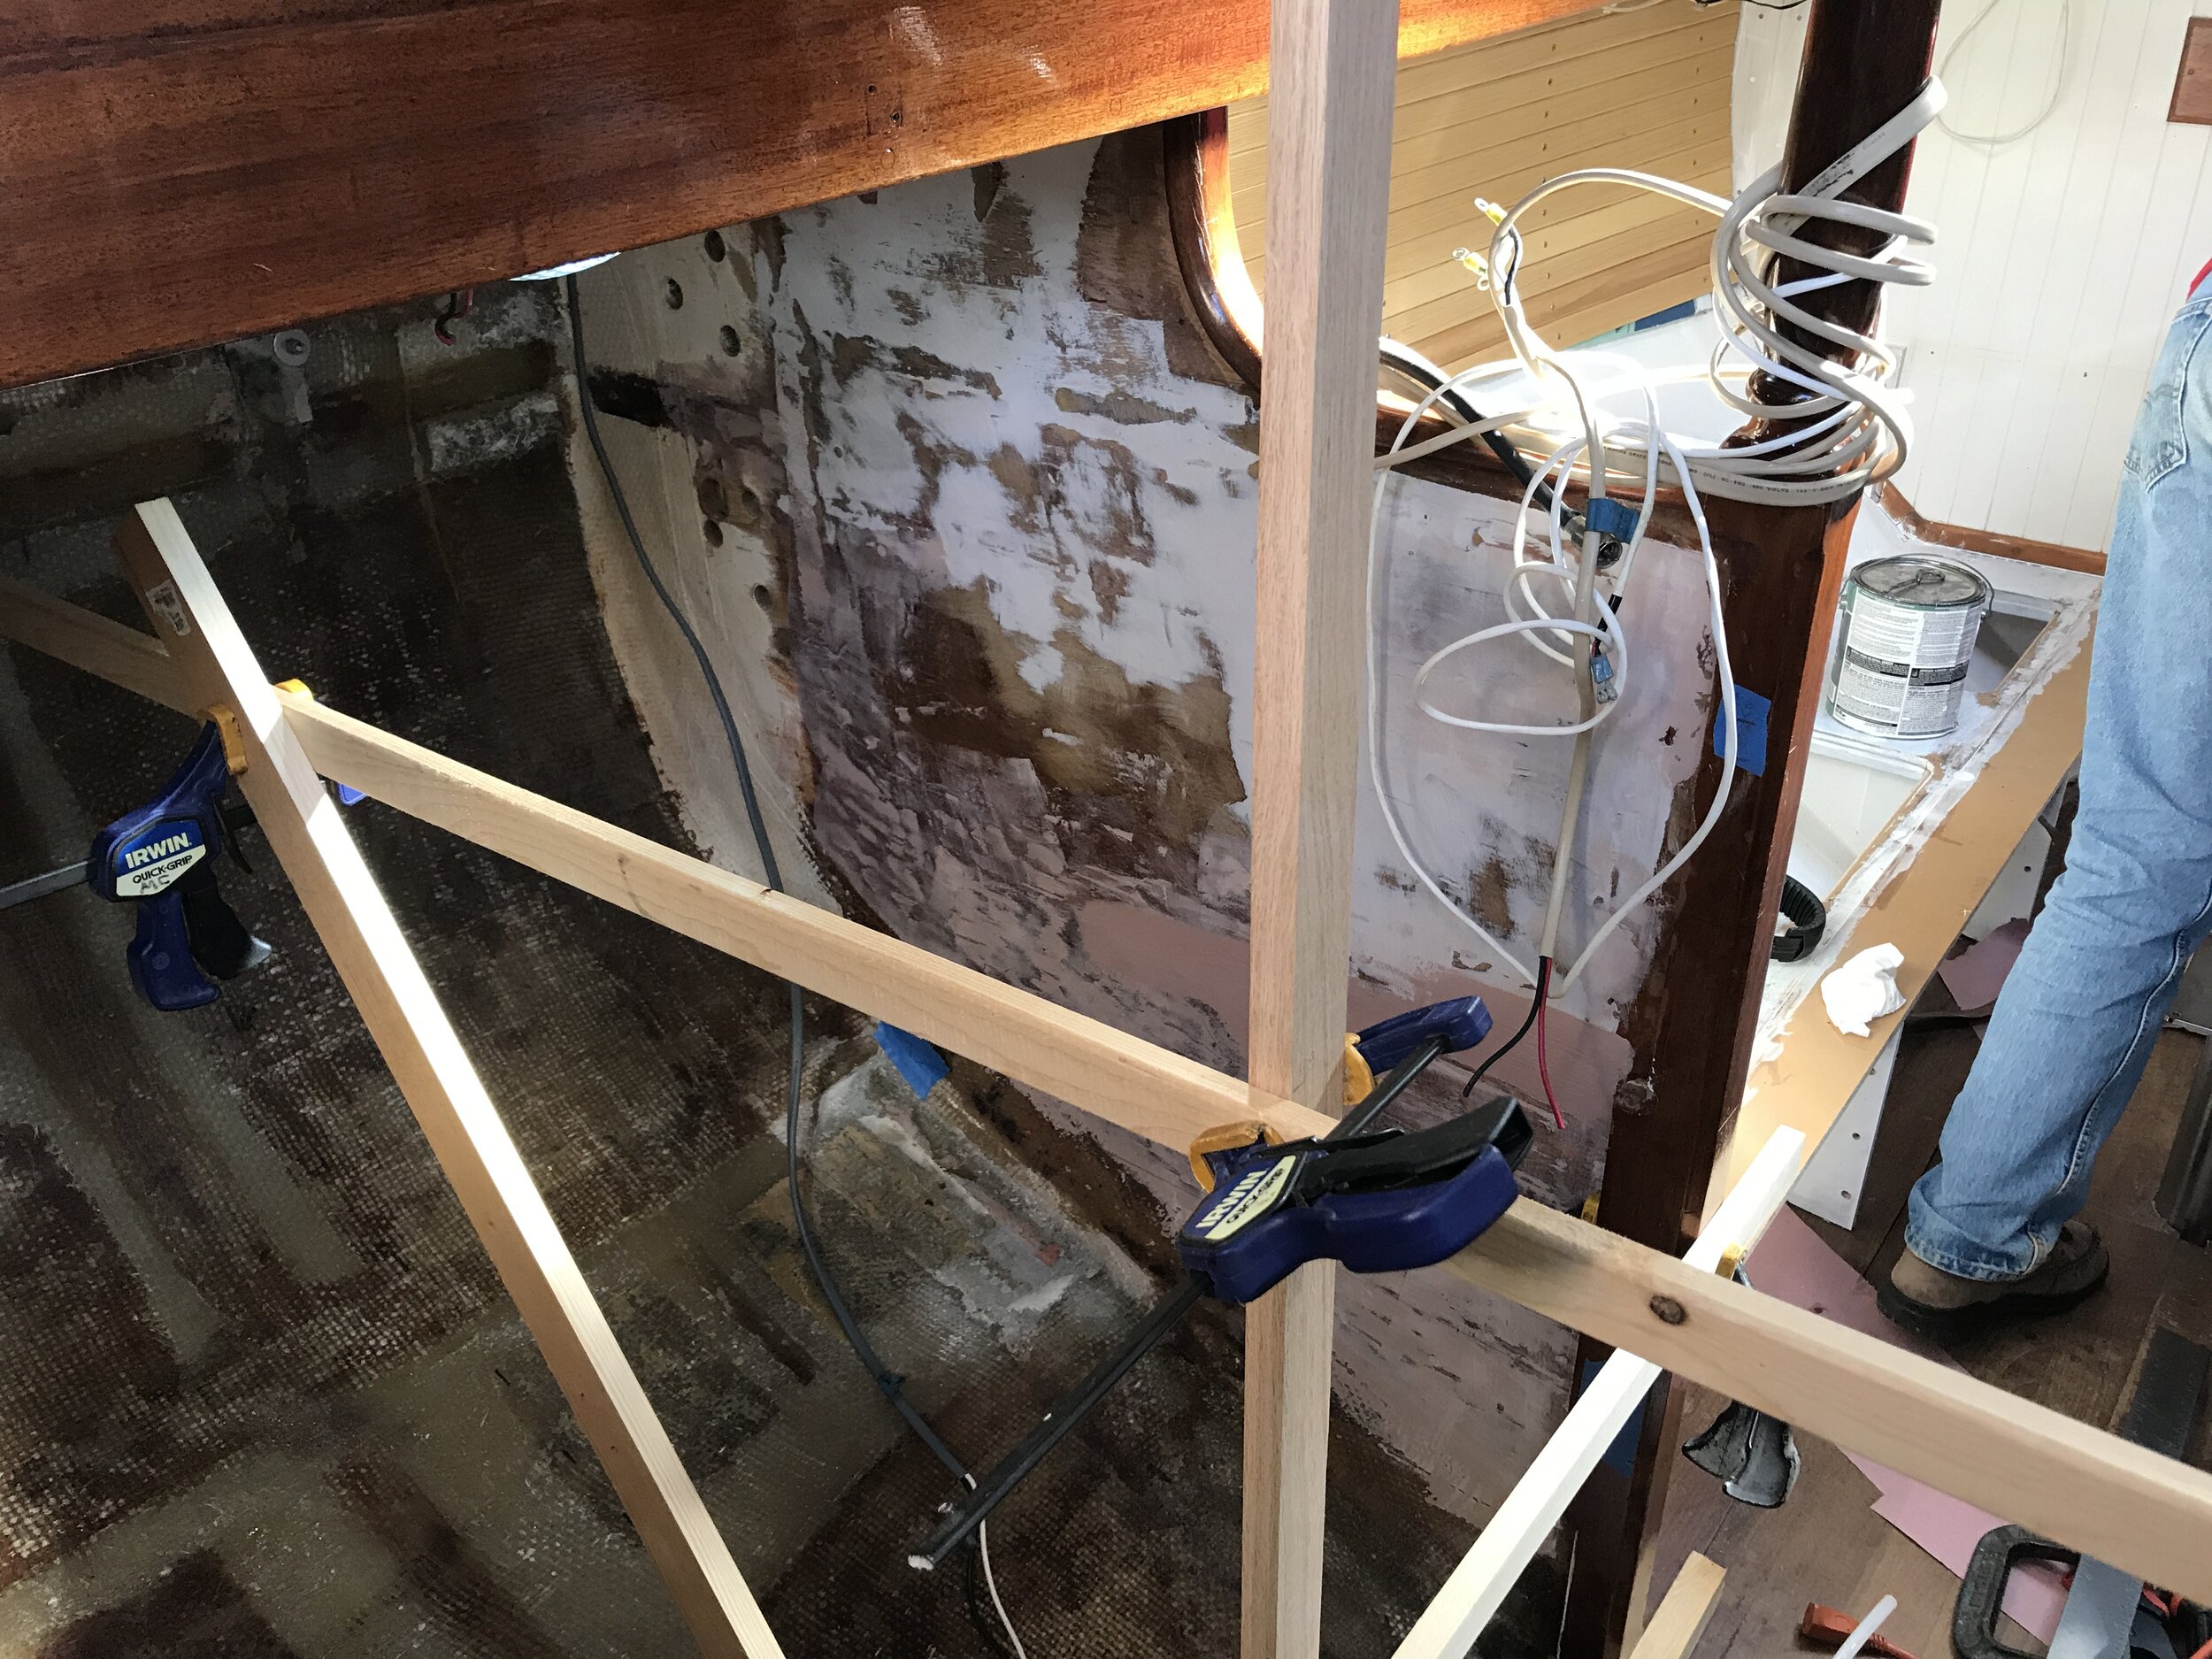
Mark the line on the hull. This involves a fairly complicated frame system to make sure the angle and dimensions are correct, all along a curving space. (in the second photo, you can kind of see the black sharpie line on the hull to the right and under the wooden piece)
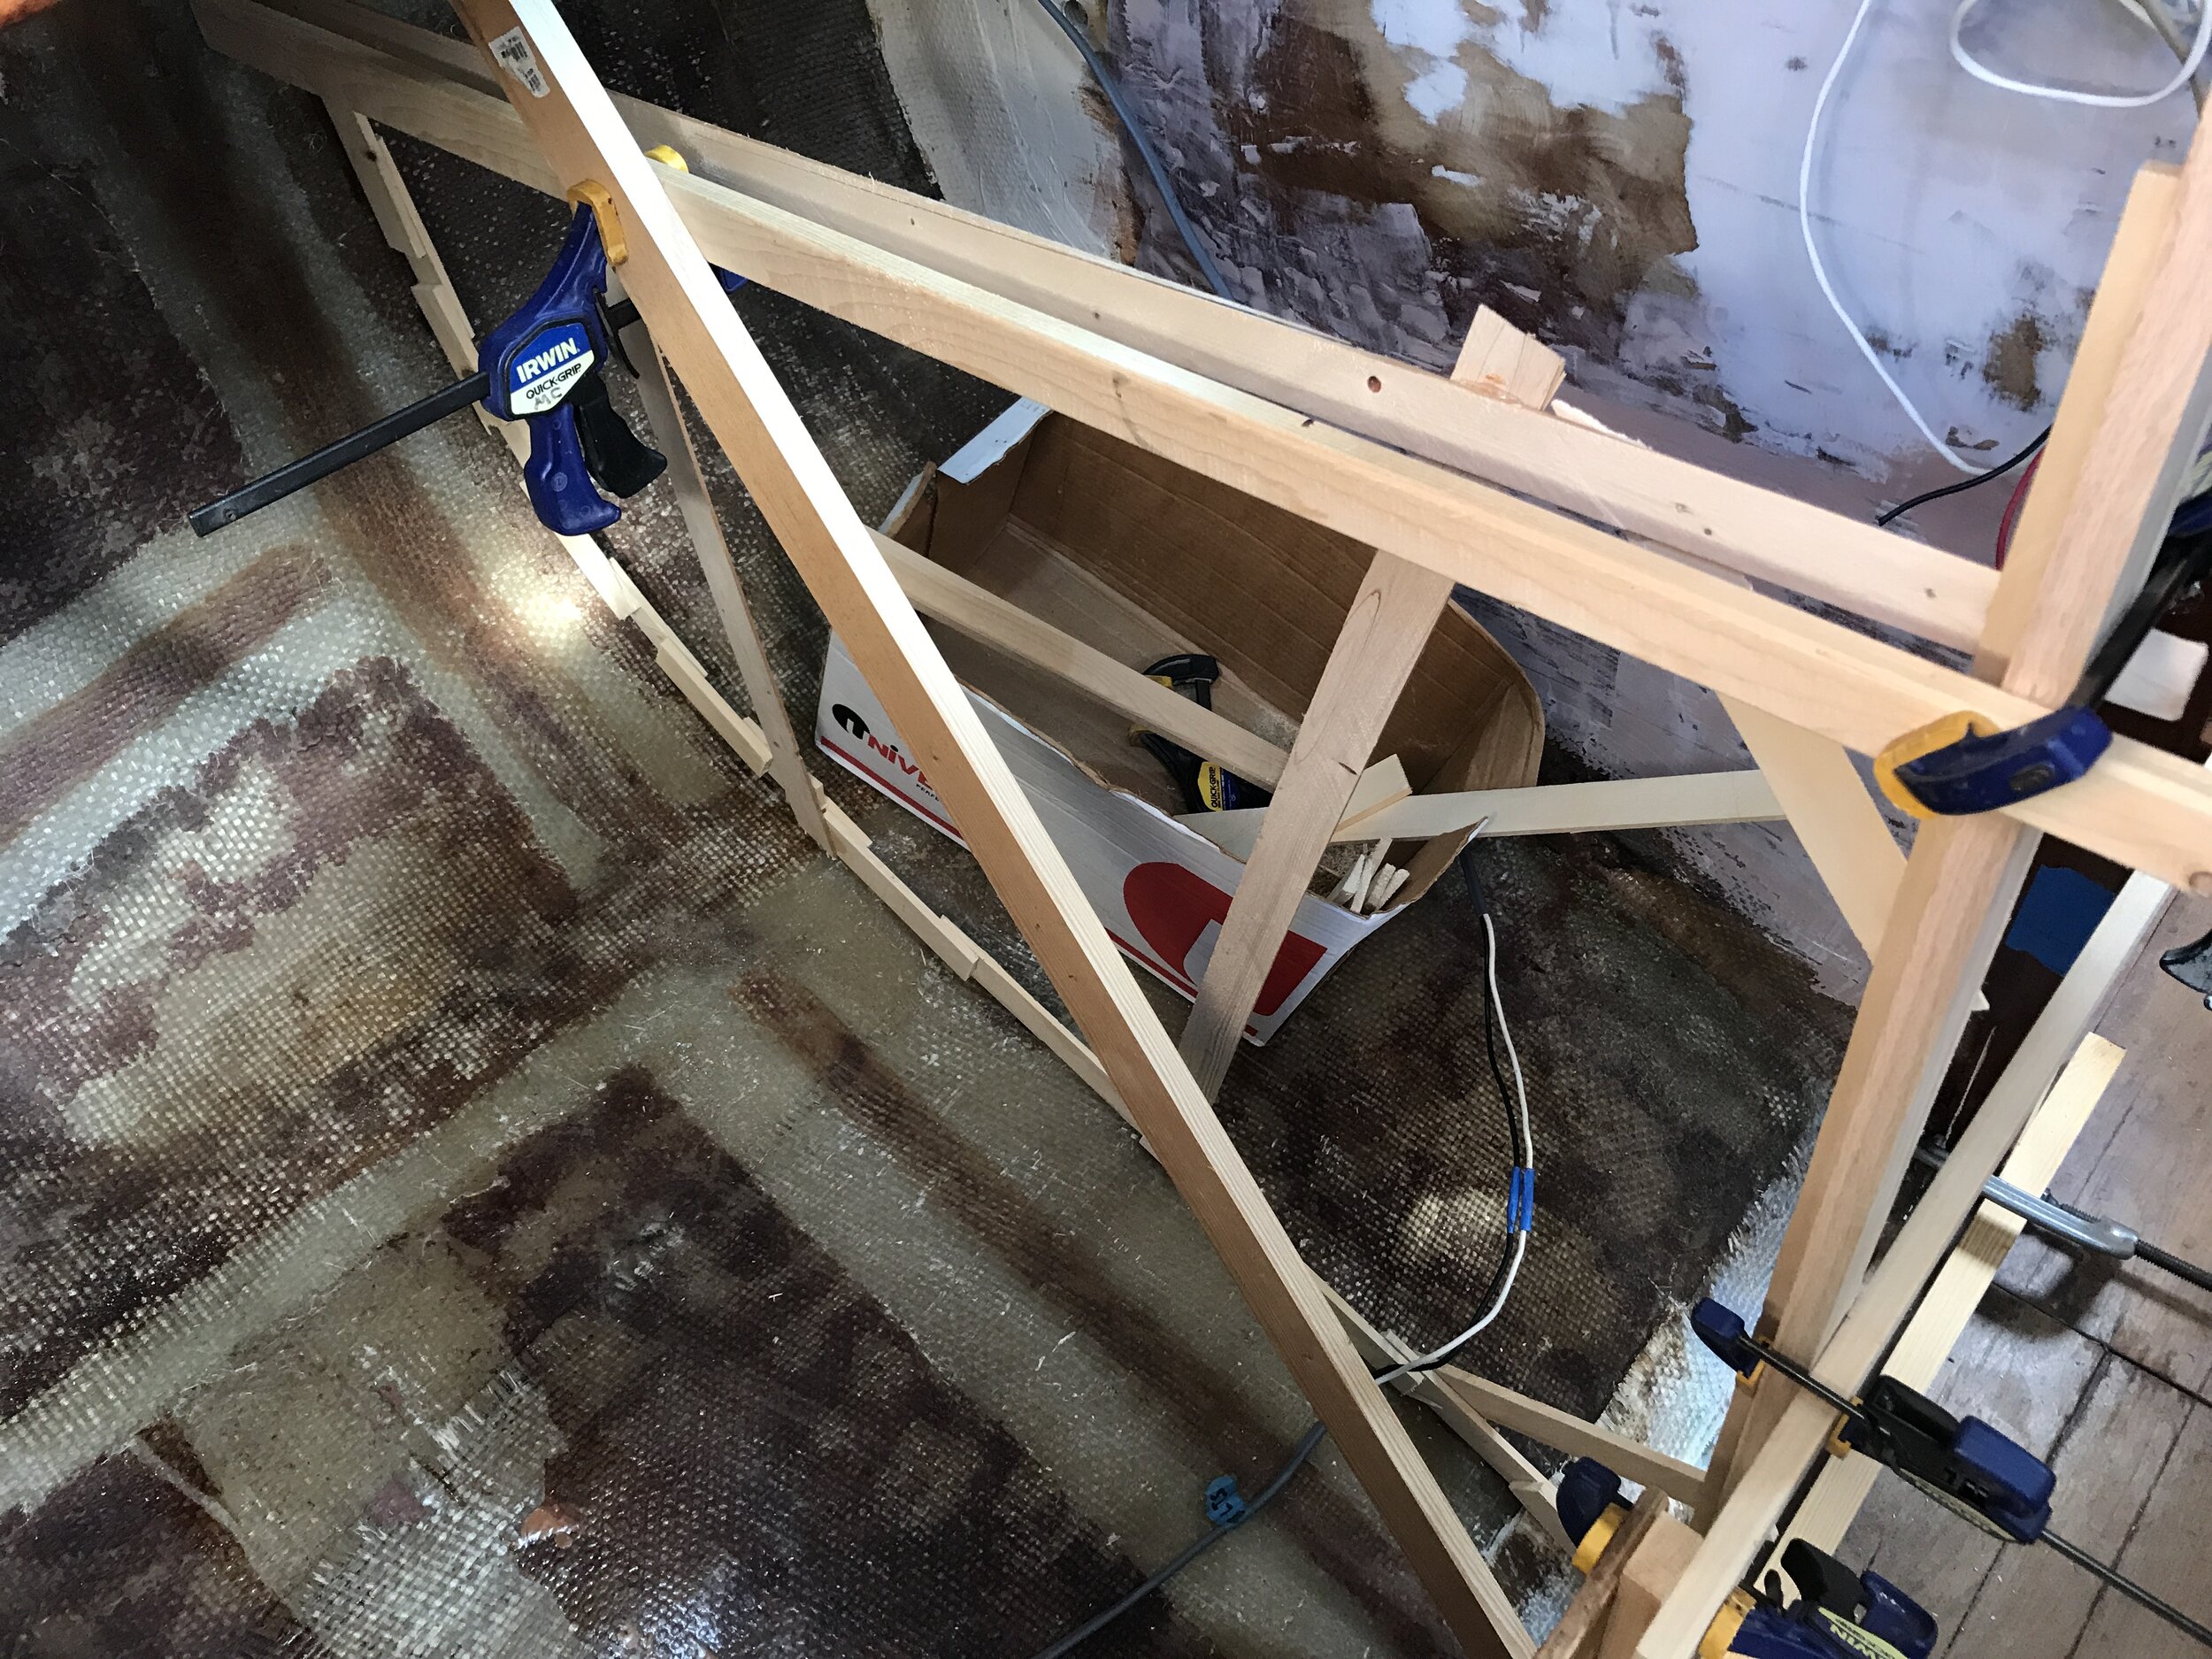
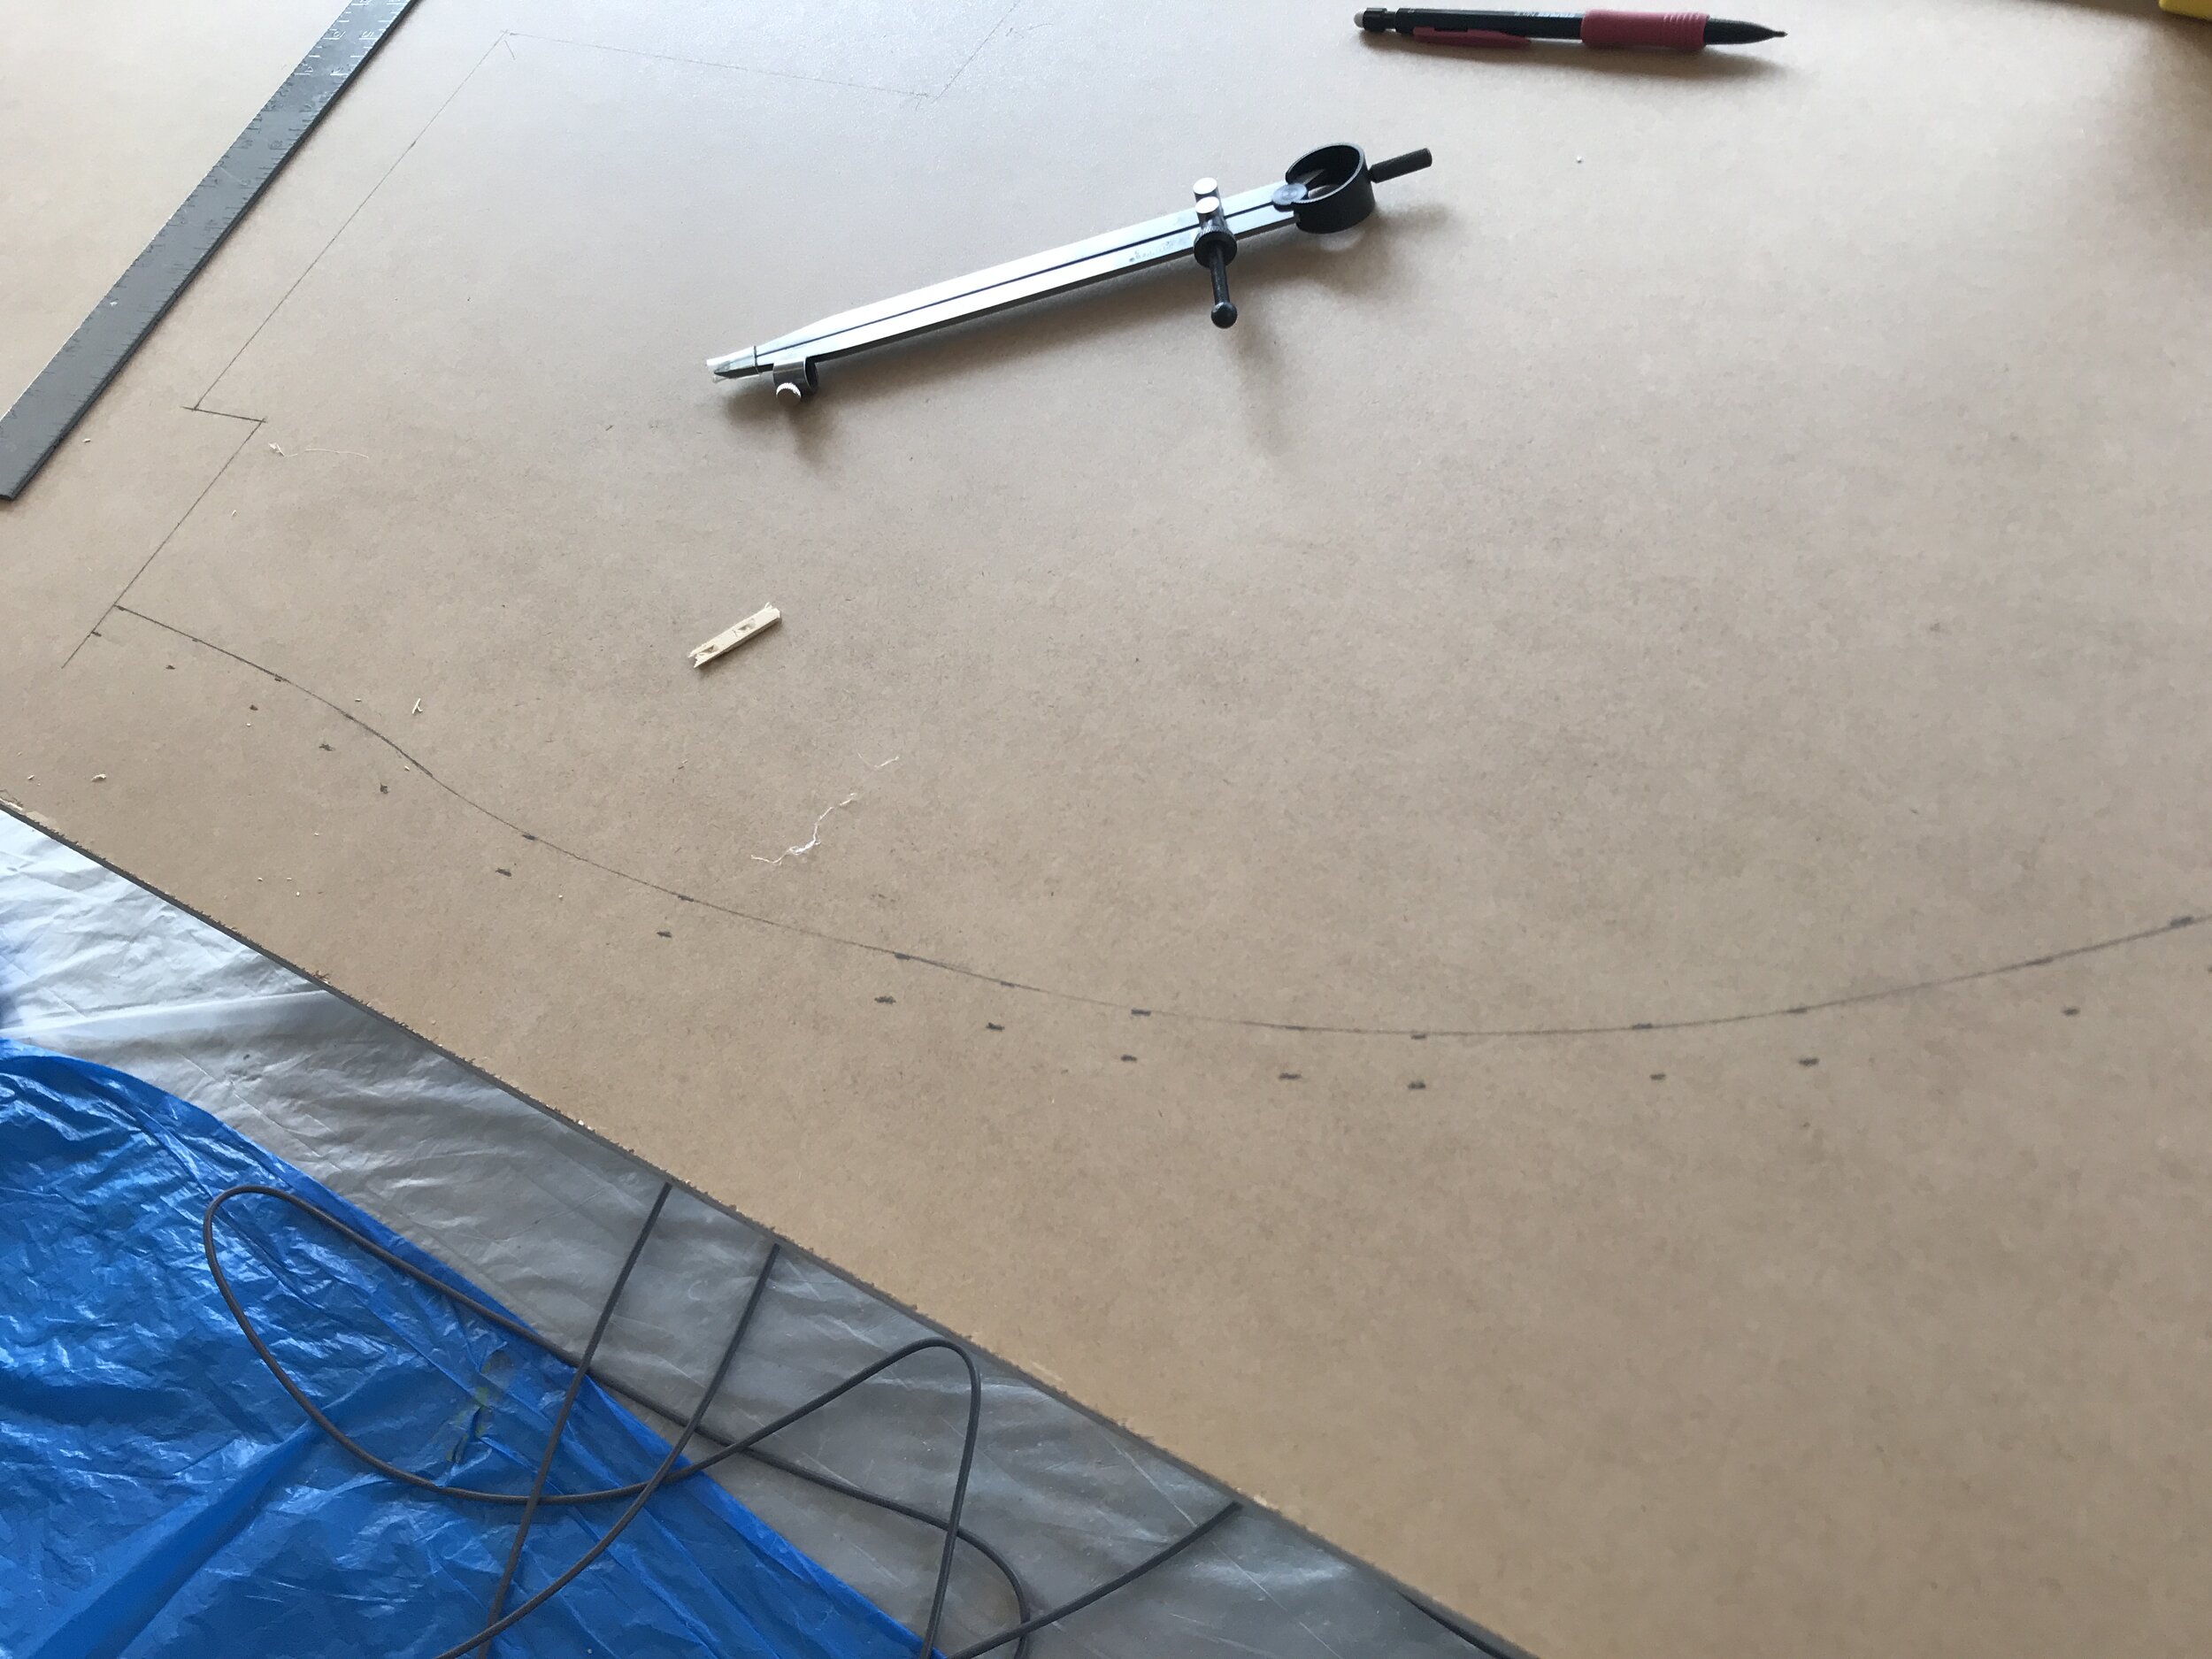
2. Create the template. This involves small pieces of thin wood, some of which are purchased shim pieces and others Jeremy ripped on the table saw from larger pieces of 2x4, and hot glue. Basically, you glue the pieces together in the right shape that you will then transfer to a piece of plywood. Smaller pieces of wood make it easy to get the curve right; the hot glue dries in just a few seconds and holds really well for the short amount of time we need it to. (Yes, there is a piece that kind of notches up, on the left side of the photo here.)
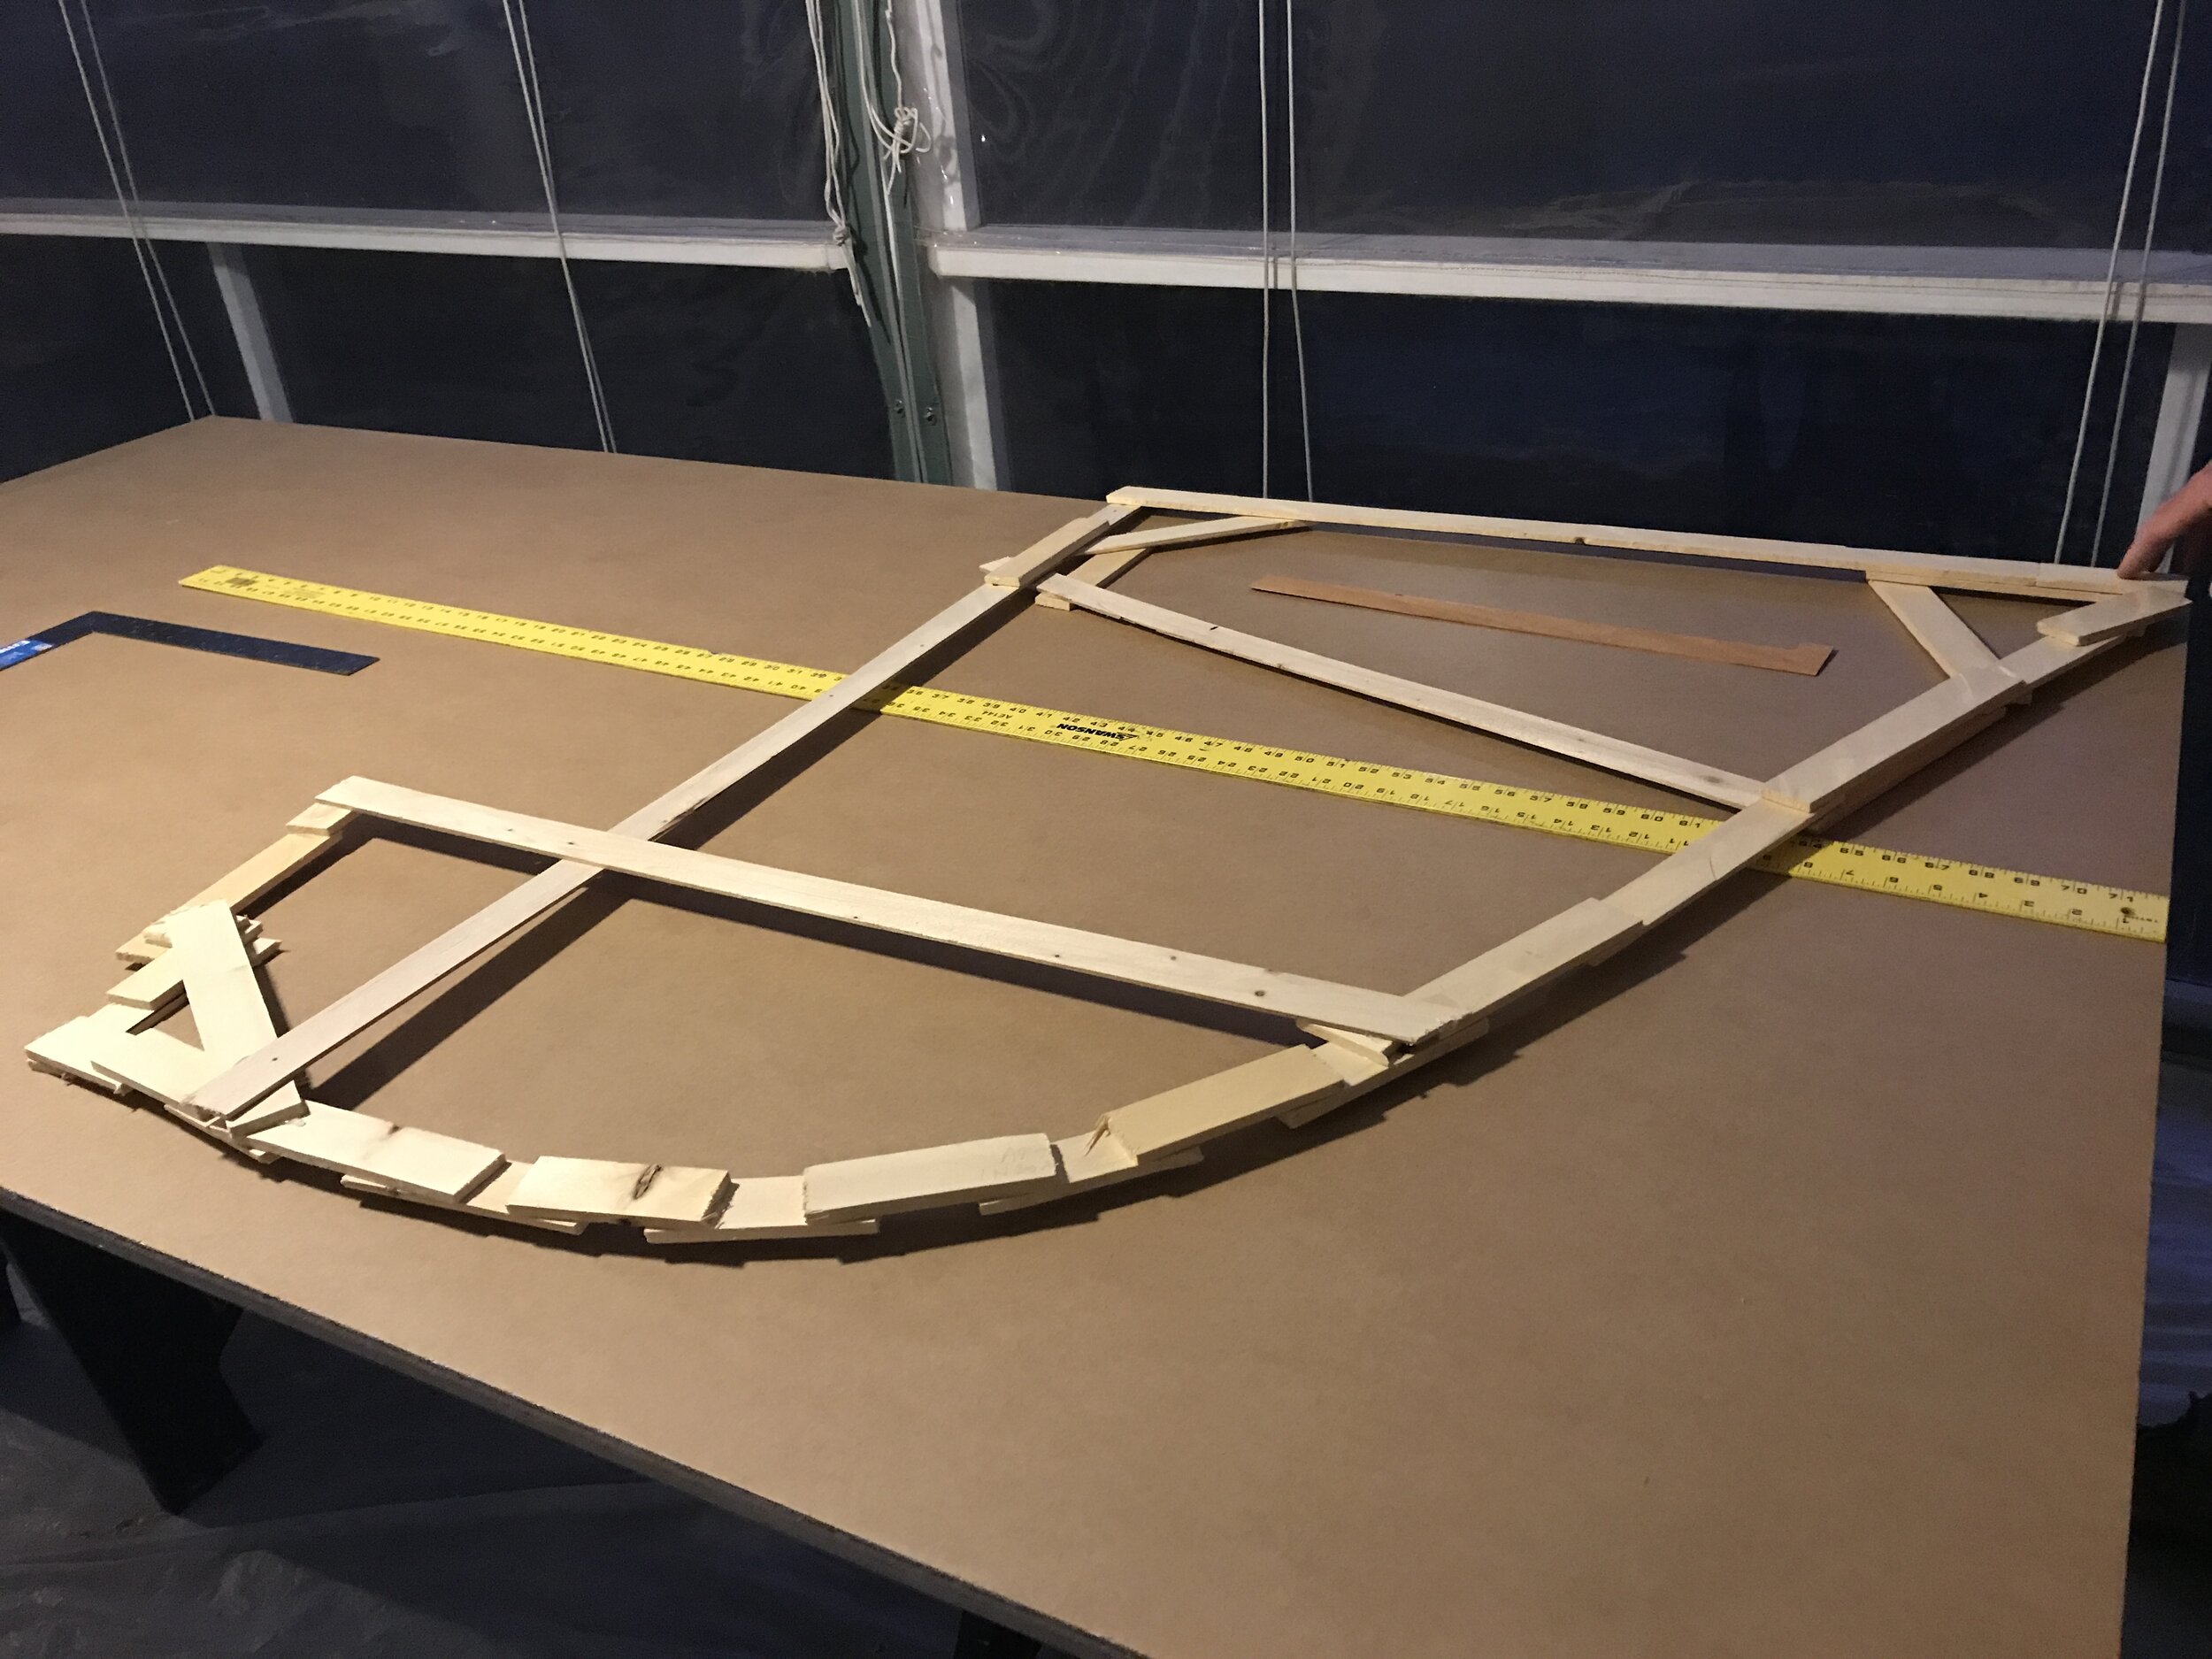
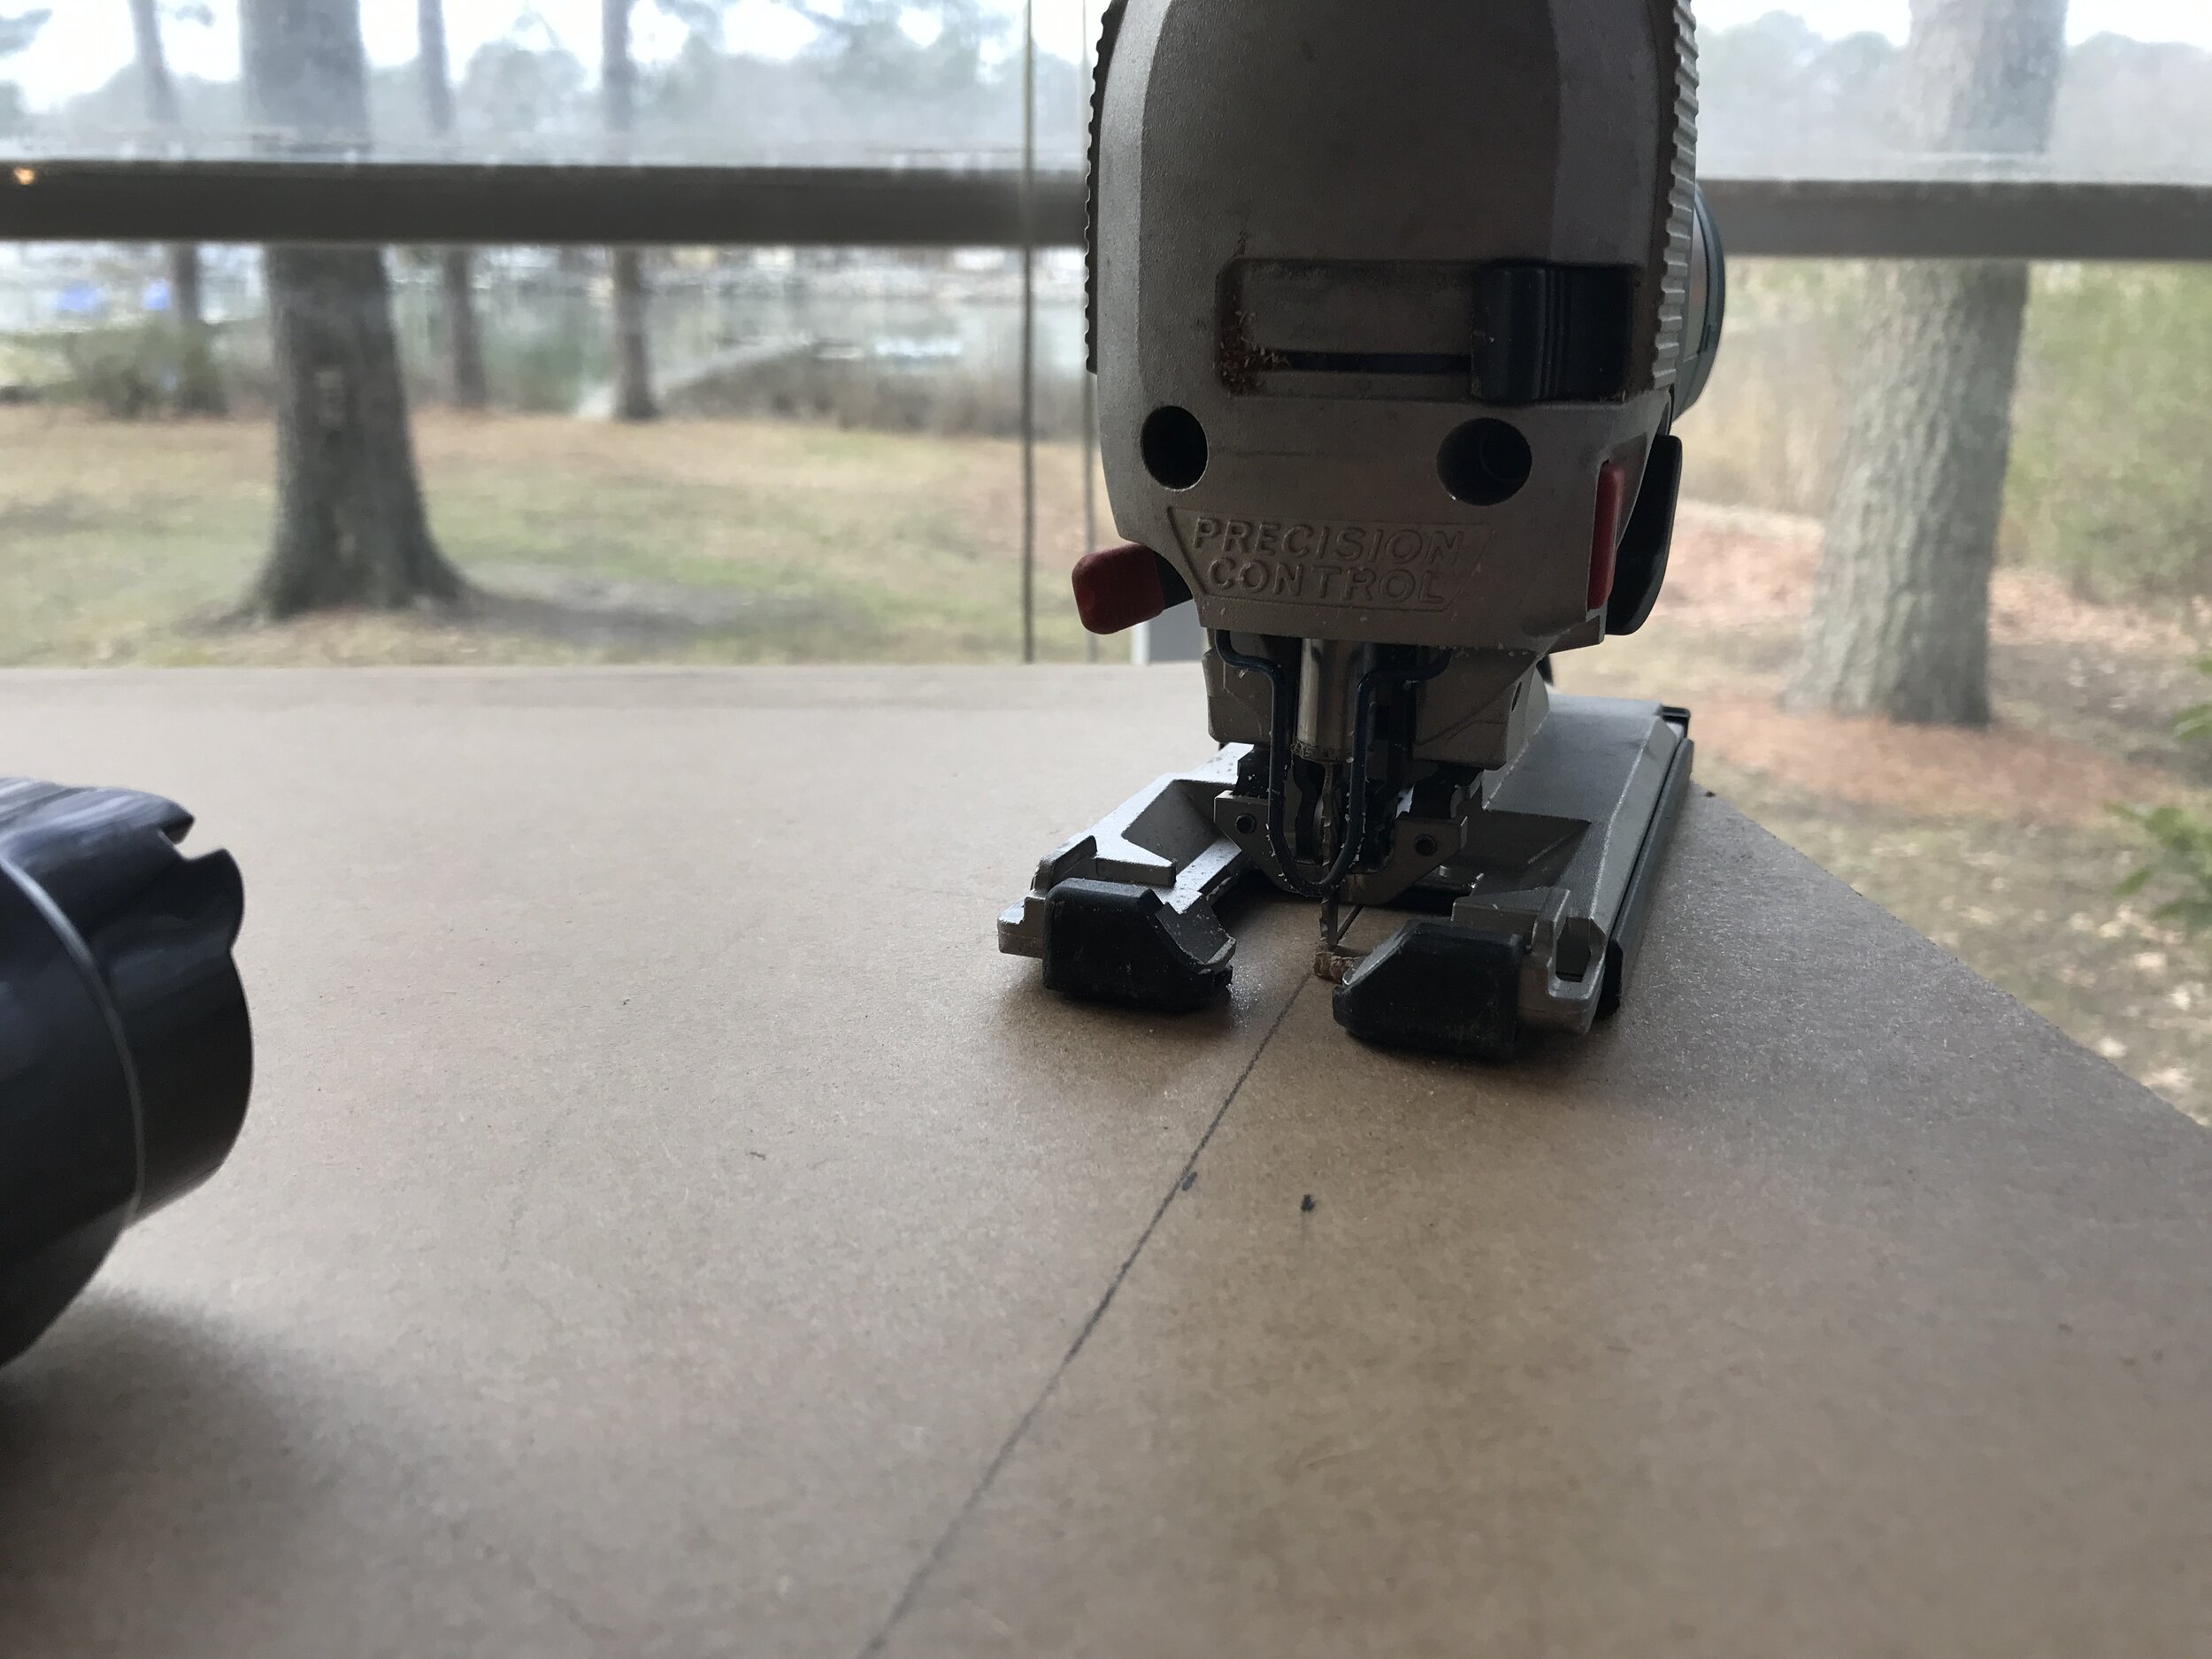
3. Cut the plywood along the template lines, then fit it in place. It will need some trimming, but the basic shape is correct. Voila, a bulkhead ready to be mounted! (See the notched piece?)
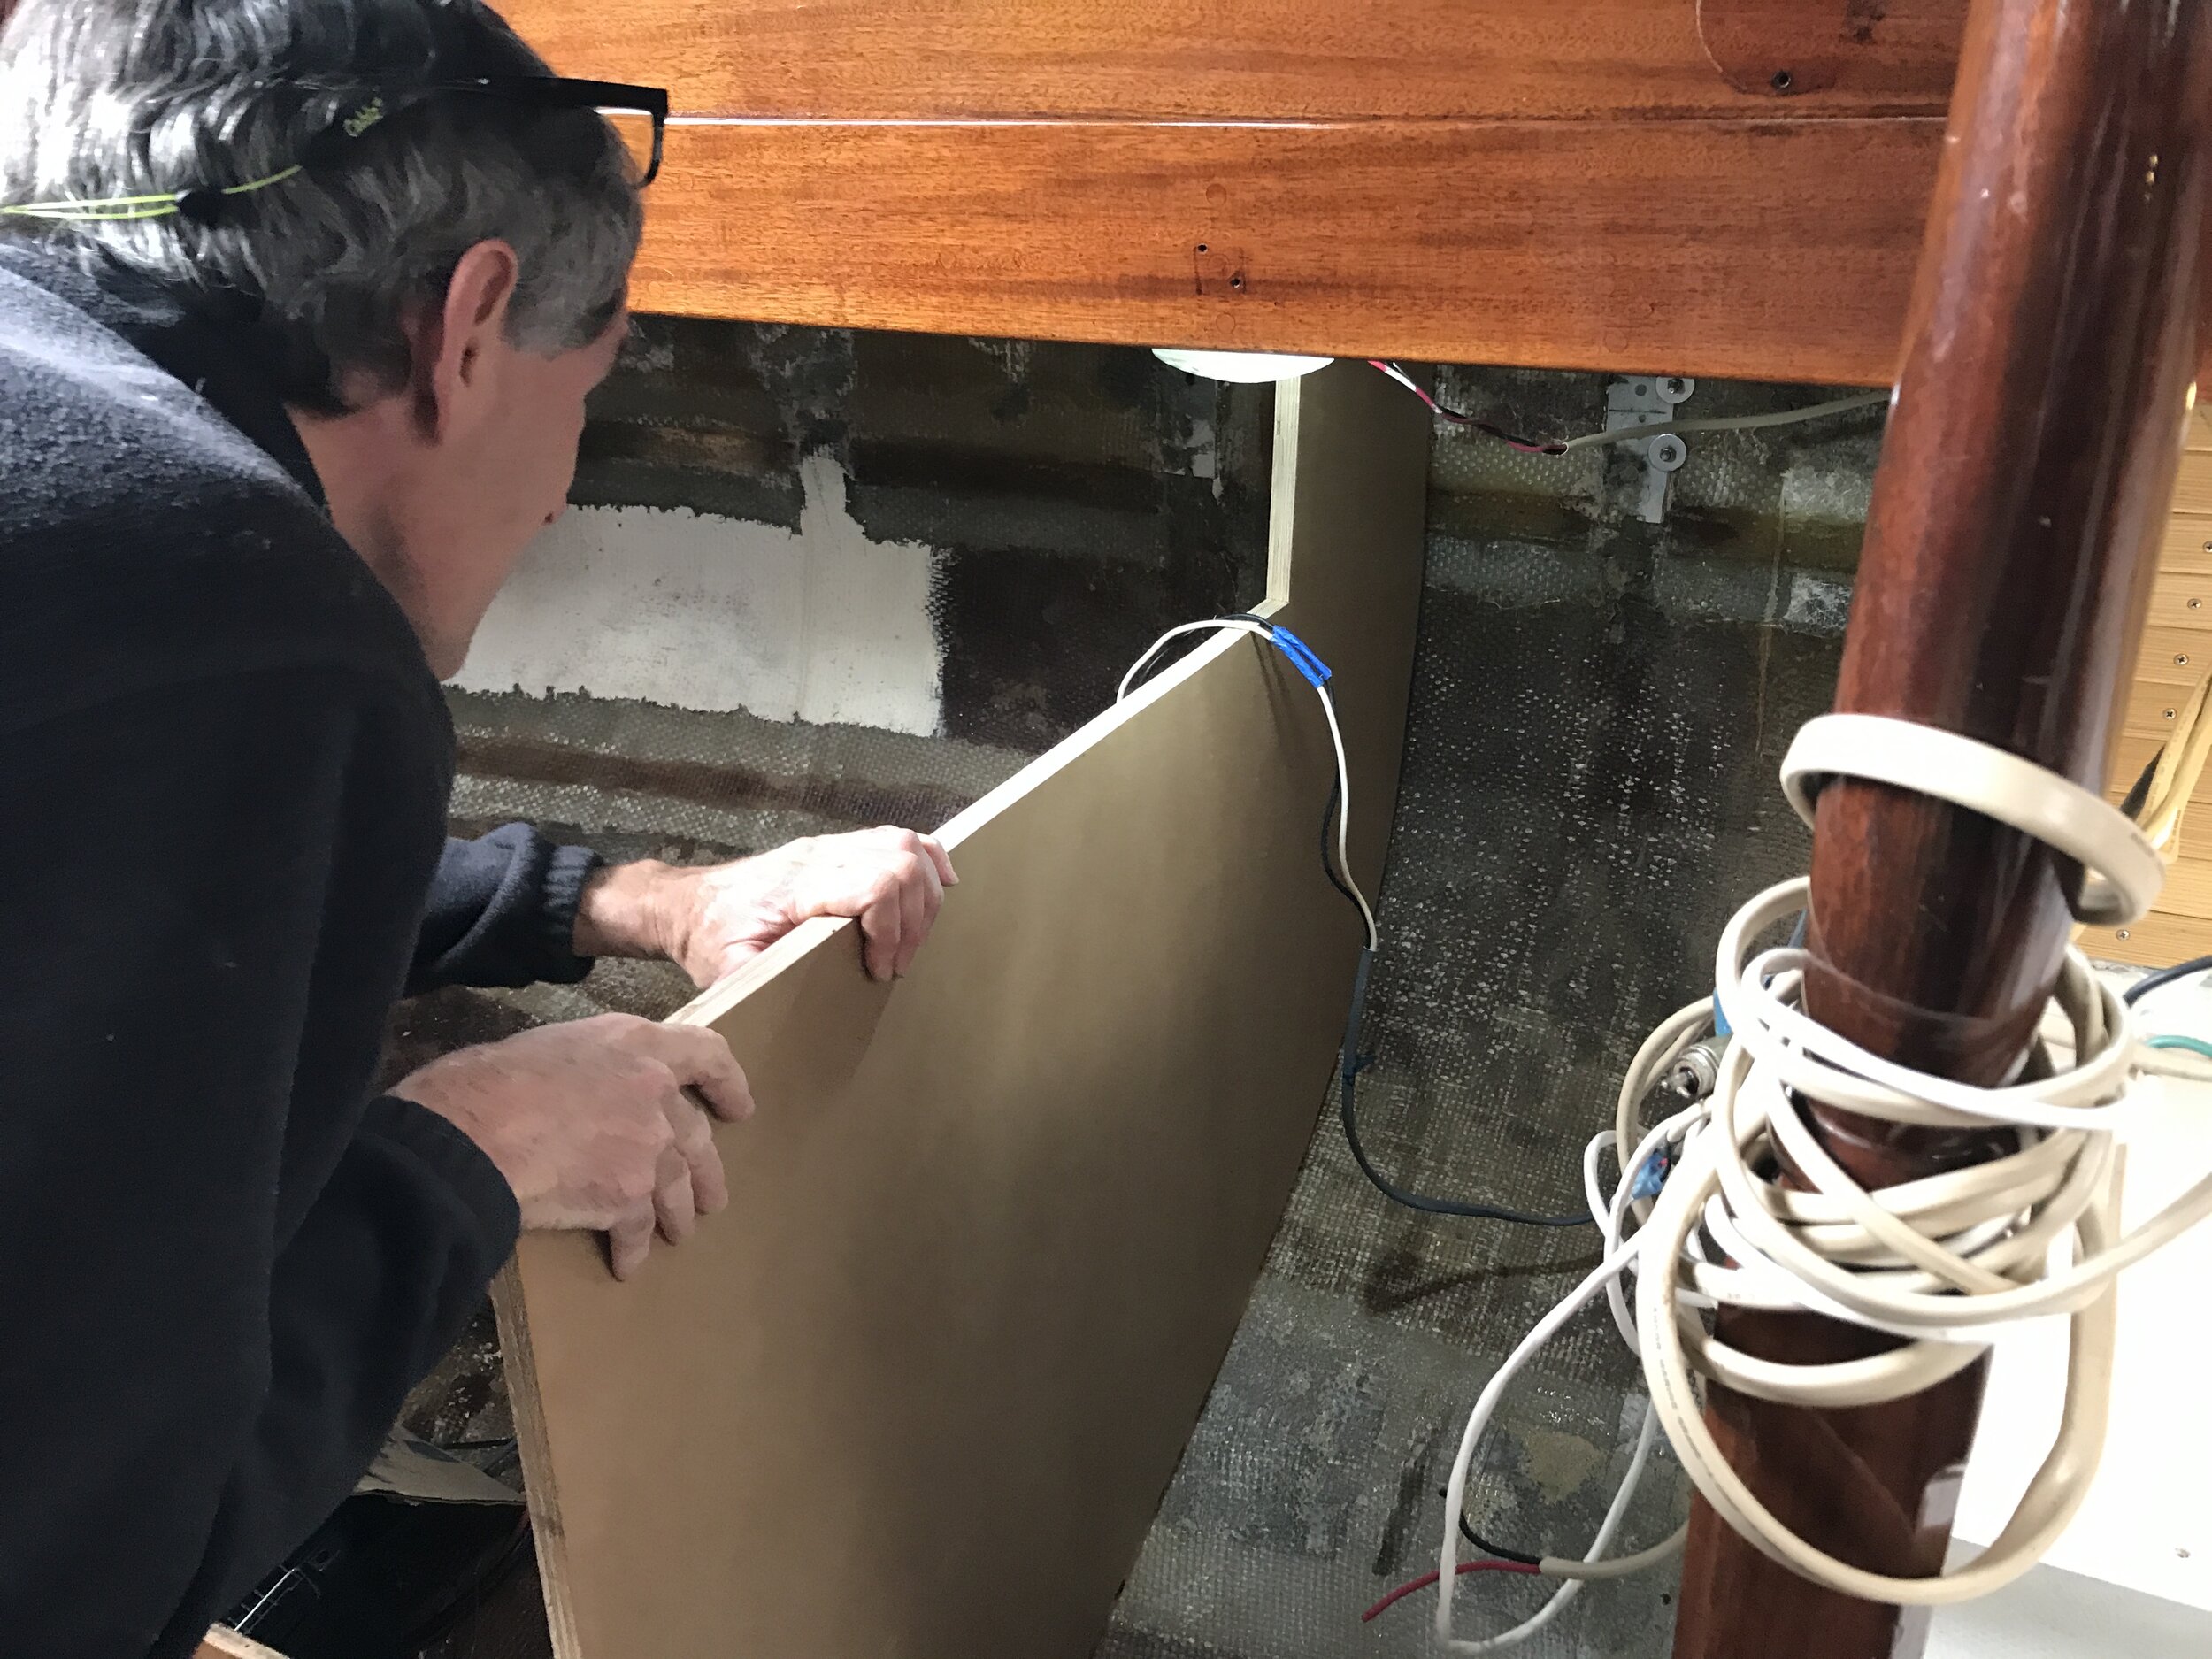
Amusing parts that are more amusing looking back than when they happened? Creating the template with the wiring going THROUGH the template. Had to undo the crimp fitting on the wiring to free the template. And, the biggie? Realizing the template would not fit through the companionway hatch (meaning the bulkhead wouldn’t either), panicking a little at the thought of having to make the bulkhead down below (space is a major issue), then measuring and realizing it would fit (barely) through the forward hatch. Whew.
Still to come: cutting the foam that goes between the hull and the wood, fiberglassing it all in place, fixing the tabs (supports) for the fridge shelf and the table top, and then painting the hull and the wood and all. Then we shift gears to the galley! (Oh. Before any of this? Putting a second batch of Bondo in the valley between where the hull meets the teak floor.)
The next blog post is about the project creep (but it’s decision creep, which affects projects) that delayed our visible work by a few hours this weekend. I alluded to it earlier, but it’s worth its own post.
Marching along . . .